A reference frame is a crucial element in robotic programming. It defines a fixed point in the robot’s workspace from which all movements and operations are measured. This ensures consistency and precision when the robot performs tasks. By using a reference frame, you enable the robot to repeat movements accurately over time, even after interruptions or changes in the environment. The frame in RoboDK is an essential component for using the Easy Automator software. In this video, you will learn how to define a reference frame in RoboDK, followed by a detailed description below.
Set Up Your Workspace #
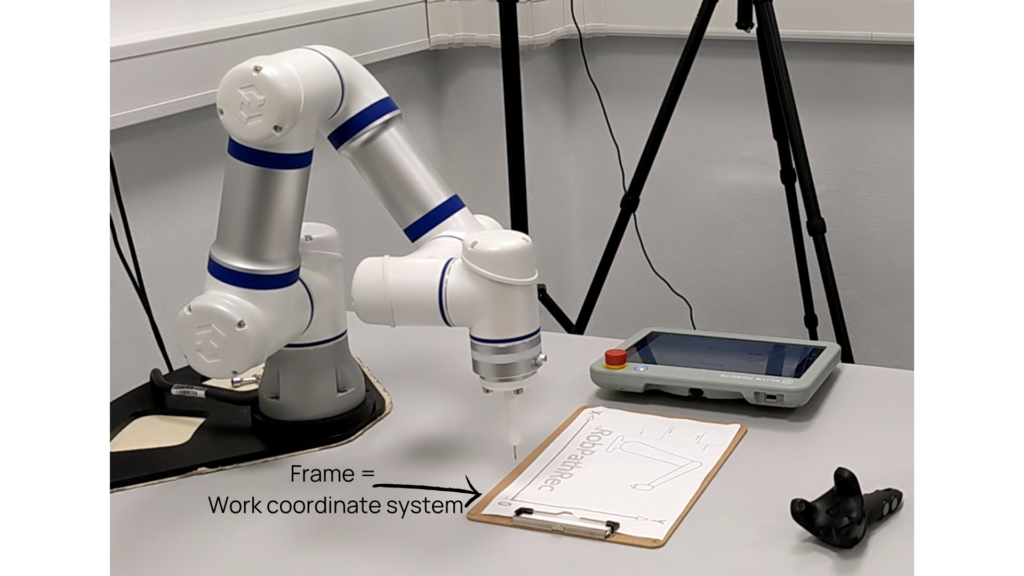
Fix your workspace (e.g., a wooden plate) securely in front of the robot. In this example, a wooden plate is used and fixed on a desk with double-sided tape. The plate must remain in the same position throughout the process.
Understand the Reference Frame Setup #
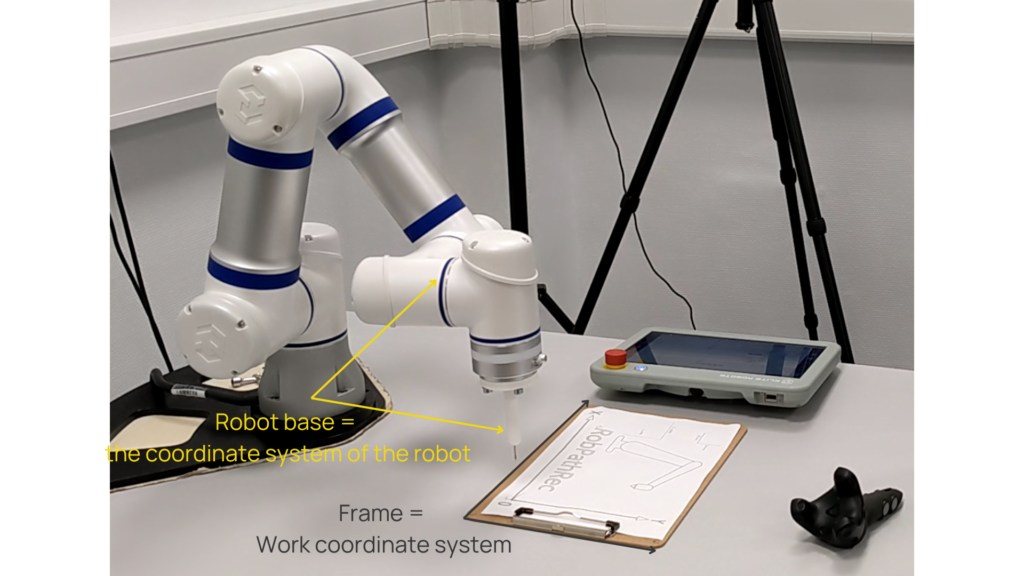
The reference frame is defined by selecting three points within the robot’s reach. These points must be in the same sequence every time: Origin, X-axis, and Y-axis.
It’s important that the chosen points can be repeated, ensuring that the reference frame can be redefined consistently if needed.
Best practice recommends not defining the three points directly on the workpiece, as its geometry or position could change. Instead, the frame should be defined on a stable, reproducible surface, such as a wooden plate, so the position remains consistent relative to the robot’s base coordinate system.
The workpiece in this example is the sheet of paper, the Frame is the fixed working space is the wooden plate.
A reference frame allows to place objects and targets relative to the robot base frame or other reference frames.
IMPORTANT: The workpiece can be bigger than the frame! The frame defines only the coordinate system relative to the robot coordinate system.
Activate the Reference Frame in RoboDK #
In RoboDK, select the correct frame (e.g., “Frame 2”) and activate it.
Right-click and choose “Define Reference Frame,” or use the “Utilities” menu to access the same option.
Make sure the correct tool is active by clicking “Activate Tool” and verifying that the tool you defined in the TCP setup is in use.


Take care, that the right parameters are selected: Frame, 3 point method (p1 = origin), using joints, right robot is selected and that the right tool is selected.

Calibrate the Reference Frame with 3 Points #
Move the robot to the origin point using free ride mode, then switch to jog mode for fine adjustments.
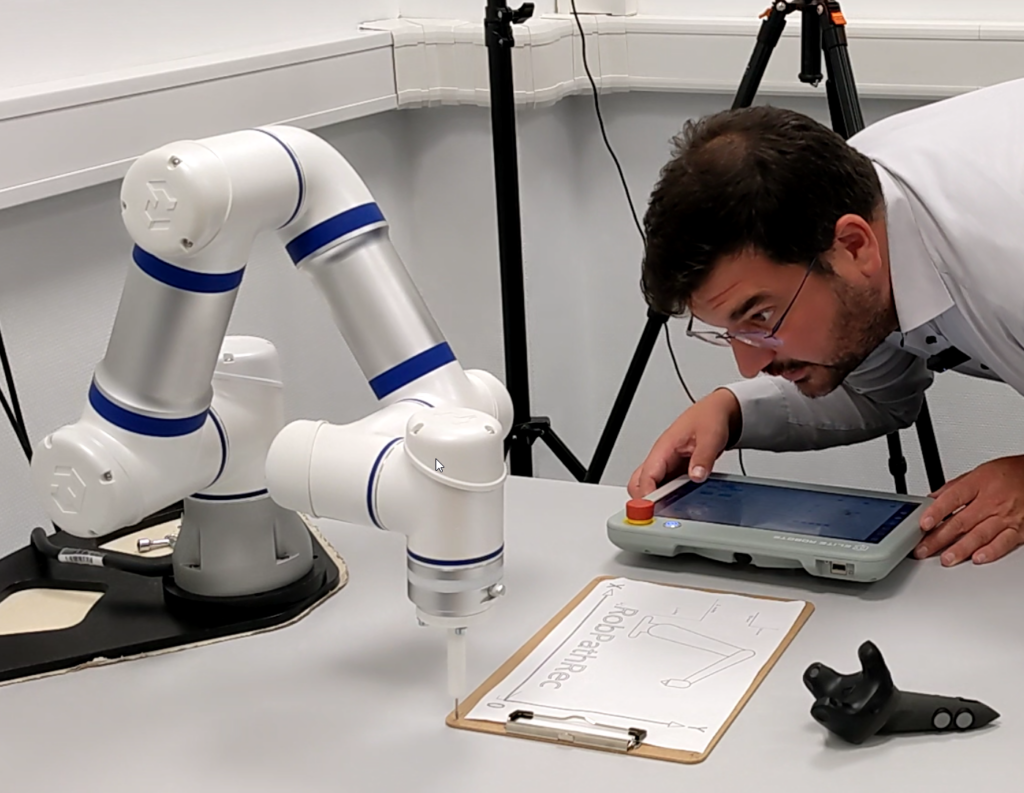
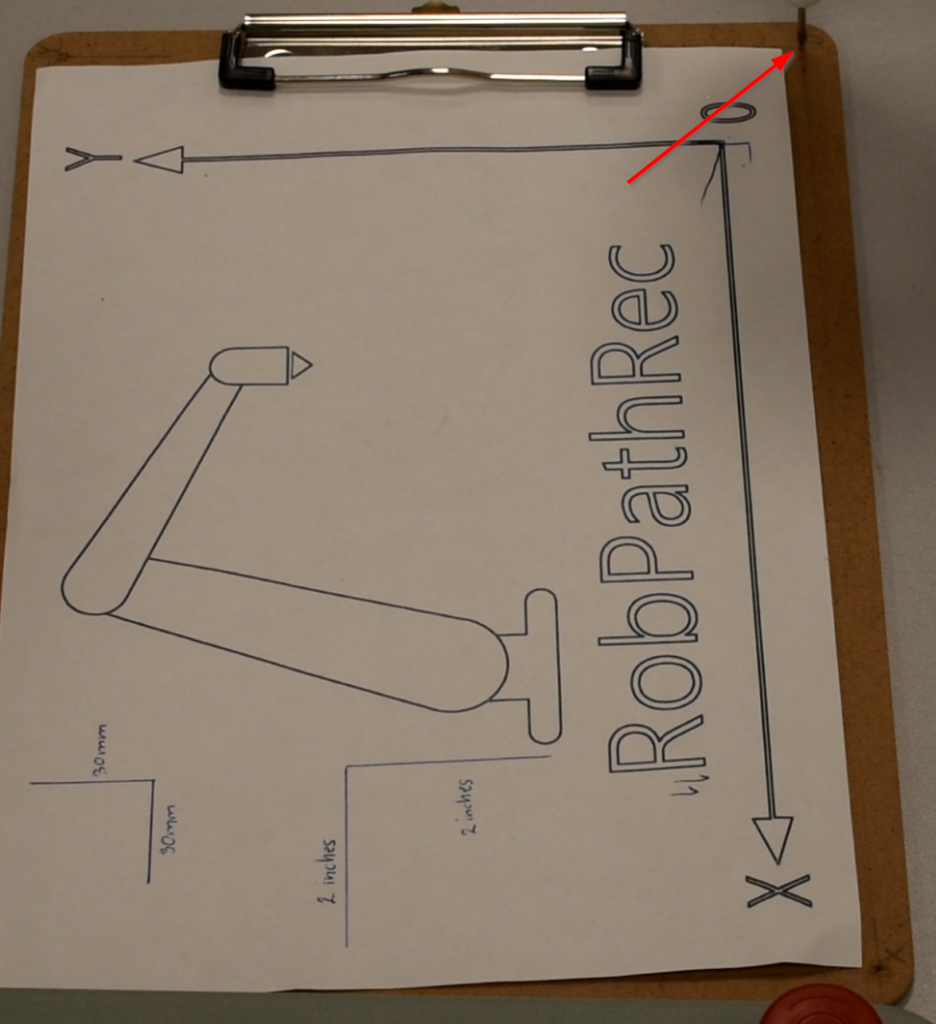
Capture this position as P1 in RoboDK. You can do this, just like you did with during the tool definition procedure:
Get position of the robot.
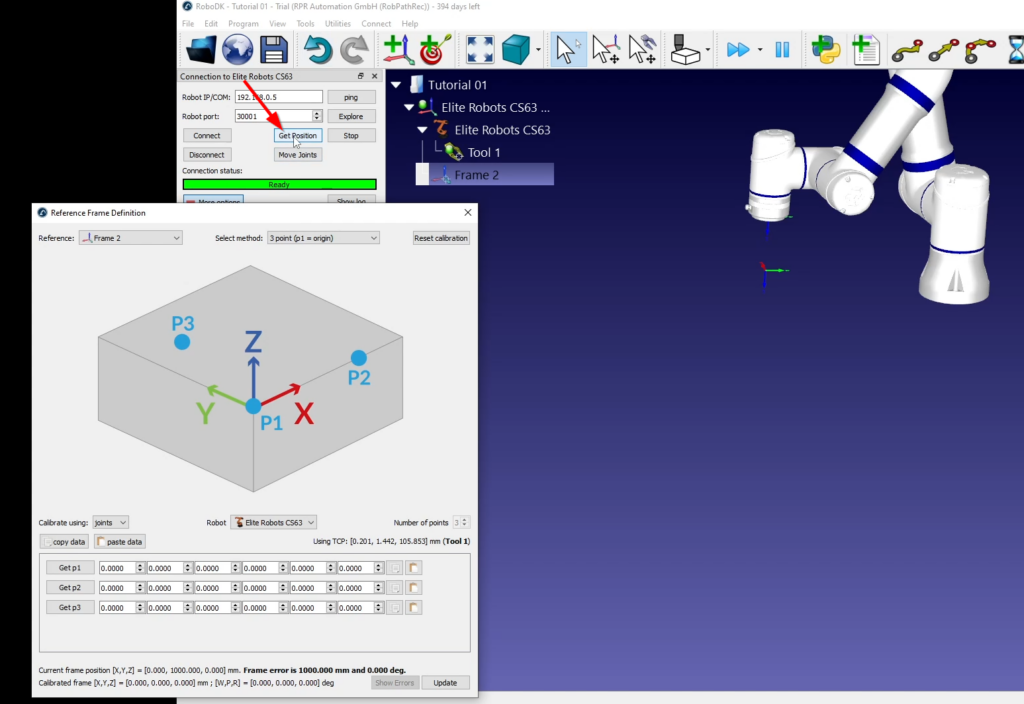
Hit the Get p1 button on the Reference frame definition window. The values will be automatically applied. If you cannot connect directly to the robot, you have to type in the joint values from your robot teach panel or software into RoboDK.
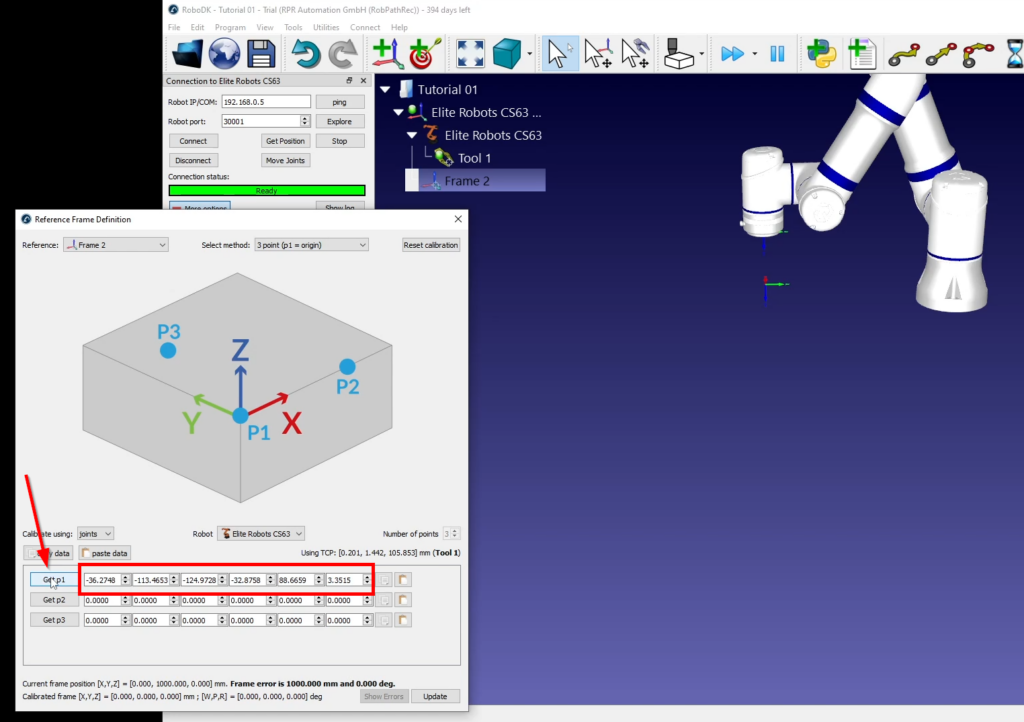
Move to the second point, which defines the X-axis. Again, fine-tune the robot’s position and save this as P2.
Move to the third point, which defines the Y-axis. Ensure the height (Z value) is accurate, and save this as P3. This defines the reference frame for the robot’s workspace.

Ensure Repeatability and Consistency #
Always use the same points in the same order (Origin, X-axis, Y-axis) when defining a reference frame. This ensures the frame can be recreated accurately, maintaining precision for the robot’s tasks.
It is not recommended to define the frame on the workpiece itself, as the workpiece might shift or change geometry. Instead, defining the frame on a stable object, such as a wooden plate, ensures that the frame remains consistent even if the workpiece changes.
Best Practice: Use a Reproducible Object #
For optimal results, define the reference frame using three points on a stable object, such as a wooden plate, that can be reproduced. For example, using an identical wooden plate with the same three reference points allows you to move the setup to another location while ensuring that the robot programming remains consistent.
This approach makes the programming portable, meaning it can be replicated on another setup as long as the same reference points are used.
Save the Reference Frame #
Once the frame is defined, save your RoboDK project by clicking File > Save.
This ensures that the robot can operate within this defined frame, providing accuracy and repeatability in all future tasks.


